Here is the tutorial I created for Catch My Party!! Enjoy and post photos if you make one yourself!
How to make ribbon covered letters and numbers.

Supplies:
Paper Mache letter or number
6 or more coordinating scrapbook ribbons (3/8″)
Long length of a coordinating 1″ ribbon
Fast drying glue or other adhesive (I LOVE Beacon 3-in-1 Advanced Craft Glue)
Scissors
Patterned Paper & Frame (optional)

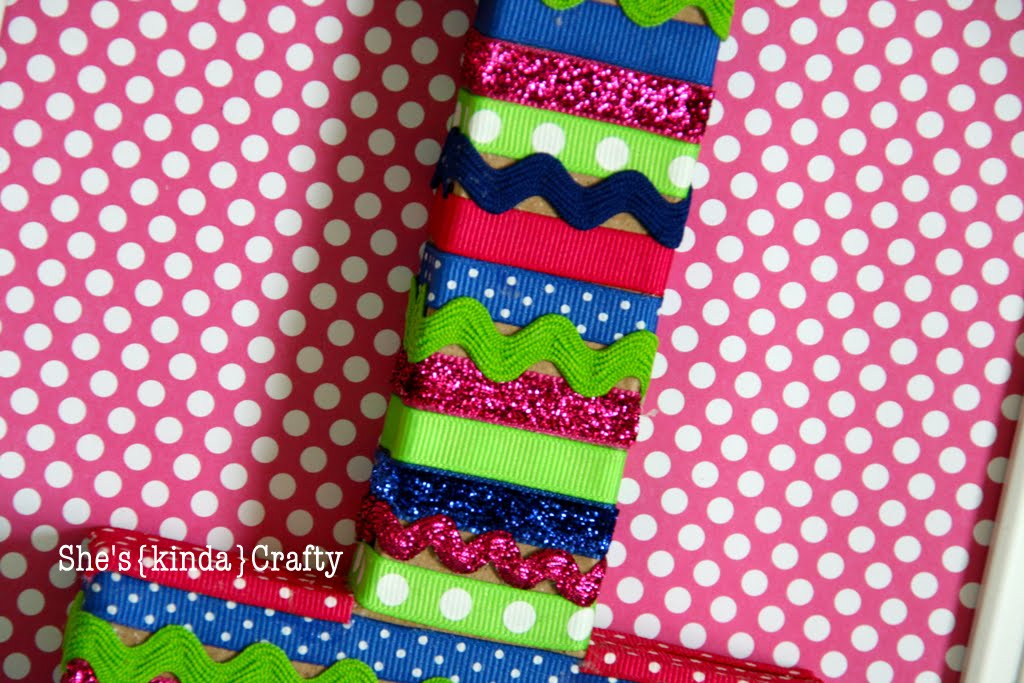
Loosely measure the length of ribbon you need to wrap around your number or letter (leave enough to wrap around to the back). Depending on your number or letter you can pre-cut your strips of ribbon. I only pre-cut enough for the “stems” of the R and the rest I cut as I went, loosely measuring each length one at a time. Apply one line of glue at a time and lay your ribbons down in whatever pattern you’d like (or go crazy and don’t use a pattern!)

You could go ahead and glue ALL your ribbon on to your number or letter before flipping it over and gluing the ends to the back. I stopped when I had reached a point where my pre-measured strips were all used up. Apply a bead of glue to the back edges of your number or letter and wrap the ribbon around. You may need to hold the ribbon while the glue sets to keep everything straight.

Repeat on other side of number or letter.

Keep on going until your letter or number is completely covered.

Starting in a corner, apply a bead of glue about 1/4″ from the top edge of your number or letter (I did about 8-10 linear inches at a time since I was using fast drying glue. Continue this around your number or letter until you’ve gotten back to the beginning, overlapping about a 1/2″ at the end.

It doesn’t matter what the back looks like!

Viola! You are done! Unless….

You can mount the number to a frame by cutting a piece of patterned paper to the size of your frame (this one is 8×10), removing the glass of your frame, insert the paper and close the frame up. Then add a whole bunch of glue to the back of your number or letter and stick it right on the patterned paper!
Don’t worry about having to buy a new frame, just take one out of your house because after your party you can just take the paper & number out & pop the glass back into your frame! (however, I did buy this frame at Target for about $4)


I love this. This is great! I particularly love how you mounted the # in a frame. Perfect for the cutest b-day party in the world. 🙂
Where did you find the letter/number? I had gotten letters like that at Michaels several years ago but I went today and they don’t carry them anymore. Just wondering where you found yours and if it was recent?
this is such a good idea! I love this! I am your newest follower and would love it if you would check out my blog and follow me too! Thanks!
-Nikki
http://chef-n-training.blogspot.com/
Great idea! I want to try this out!!
I love this idea! It is so cute! This is going on my to-do list! Thanks for sharing!
These are adorable!!
So fun!! I’d love for you to link up!!
http://polkadotsonparade.blogspot.com/2011/05/wow-me-wednesday-11.html
I never thought to cover my letters with ribbon. I’m totally going to have to do this! Thanks for sharing your adorable letters! Visiting from TT&J
LOVE this!! Will have to make one for my Magpie’s 1st bday!! Thanks for the inspiration!!
http://jandmseyecandy.blogspot.com/
Cute! Great idea!
what a super cute idea! following you from I heart nap time 😉 this would make a great birthday gift!
–Michelle
Such a cute idea! I love how there is so much variety with this project. Great job!
So adorable! I’m going to make one for a co-workers daughter’s first birthday. Thanks for sharing…I found you through Sundae Scoop link party 🙂
Amanda
sleepytimeproductions.blogspot.com
This is so cute. I love the idea of framing it for a birthday! Terrific tutorial.
xoxo,
Amy
very cute! I think I’ll try one too!
I just made one for my daughters up coming first birthday, I will have to link up once I post about it. I couldn’t find a #1 at any of the craft stores around here so I improvised and made one out of an I 🙂
i just made this for my son’s 1st birthday in a couple of weeks. love it!!!!! thanks for posting!!