Shes {kinda} Crafty

Dedicated to All Things {kinda} Crafty

  • Home
  • Blog
  • About Me
  • Shop
  • Wreaths
  • As Seen On
  • Privacy Policy

Key Fob {Crazy}!!

July 15, 2011 By Stacy 4 Comments

If you are a Facebook liker of She’s{kinda}Crafty you know that I recently posted a photo of some completed key fobs that I made. This is a very easy and fun project that is also very low cost, especially when made in bulk.

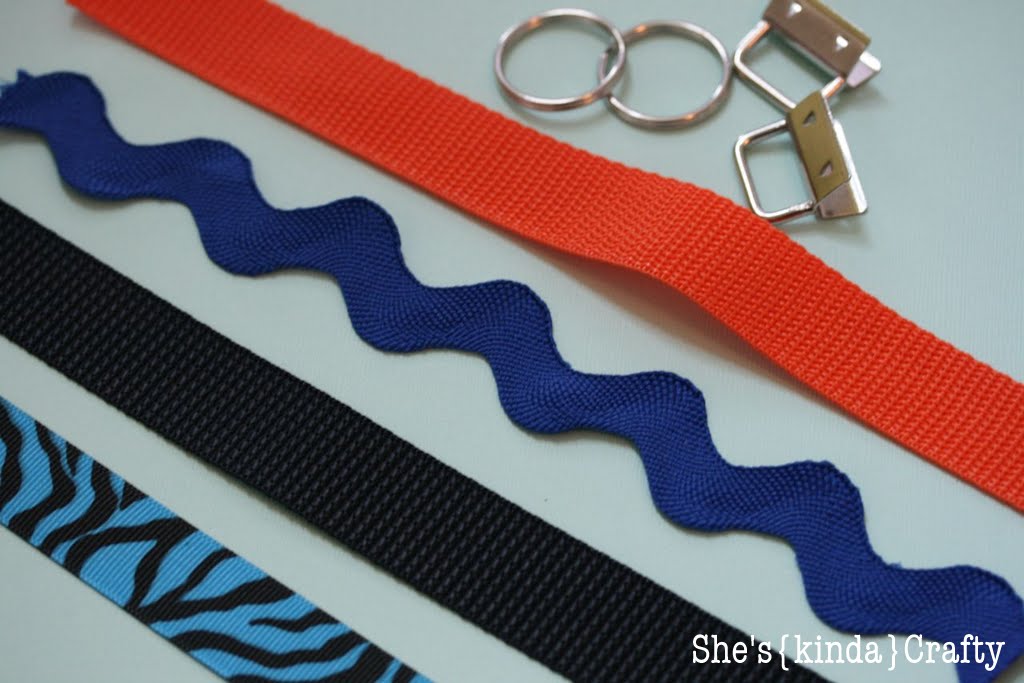
I was searching around Etsy last week for something other than key fob kits for a project I am doing for a friend (post and tutorial to come later) when on a whim I decided to add 10 key fob hardware kits to my shopping cart. I mean, it looked easy enough to make and the investment was pretty minimal, so what they heck. Here is the store that I used, Everything Ribbons, who were fantastic (quick responses and really fast and reasonable shipping) to work with. I went with the 1″ hardware after they let me know that 1″ webbing was what is most commonly available in sewing/craft stores. Meanwhile, Hobbly Lobby had all their by-the-yard ribbon & trim 30% off this week, so all the stars were aligning telling me I needed to make key fobs, plus it’s a great scrap ribbon buster. So I bought a couple different colors of the thin webbing (only $0.99/yd when it’s not on sale) and came home and searched through my ribbon boxes, picked some ribbons and got started. Here are the details for you!

Supplies:
1 inch wide thin webbing – 10 inches
7/8 inch wide ribbon – 10 inches (you can use any width smaller than 1″)
Key Fob Hardware set
thermo-web/stitch witch/hem tape – 10 inches
coordinating thread
pliers
duct tape (or painters tape and some extra thick ribbon)
lighter
 Cut your hem tape a little bit shorter than your ribbon and follow directions on the package to temporarily glue your ribbon and webbing together. (if you like pinning your projects you can skip this step and just pin your ribbon to the webbing to line it up for sewing)
 In my opinion this is the most annoying part of this project. For every different ribbon you pick you need to re-thread your machine with a coordinating color. I am so lazy.
 Next you want to sew the ribbon to the webbing as close to the edge as possible (like 1/8″). However, if you are sewing on the giant Ric Rac you are going to need to sew along the valley of the curves. You can kinda see it in the photo below – that’s the back of the webbing.
 Next, fold your webbing in half and sew it together, making your loop. I would sew 1/8 – 1/4″ from the edge. You just don’t want to have the stitches showing once you attach your hardware.
 Next, trim any strings you have and then seal the ribbon and wedding ends with a lighter.
 After you’ve raided your husband’s tool box and found what you think may or may not be pliers you will need to cover up the edges of those “pliers” so that you don’t make marks on your shiny, pretty hardware. I first tried just using painter’s tape to cover the pliers but that was a crafting FAIL (photos below) so I found an extra piece of thick Ric Rac in my ribbon scraps and secured it to the pliers with more painter’s tape.
 Slip your hardware in between the teeth of the pliers (I am just making terms up now) and press down a litter to get it started. Then insert the sewn end of your webbing loop and press it closed!
 It should look like this when it’s all finished.
 It should NOT look like this.
 And here you go. Aren’t they pretty? This would be great for a group gift, stockings, teacher’s, fund raisers, etc etc!
 

Related posts:

Default Thumbnail20 Minute Tuesday | Mini Key Fobs Default ThumbnailHow to Sew a Sea Shell Bag Default ThumbnailMod Podge {CRAZY} Default ThumbnailDIY Chalk Apron | Ann Kelle Fabrics

Filed Under: DIY, sewing, tutorial

← Twine {Storage}! Clippy {Clip} Board! →

Comments

  1. PeaceLoveApplesauce says

    July 15, 2011 at 6:52 pm

    LoveLoveLove these!!

    Reply
  2. Kelli @ RTSM says

    July 16, 2011 at 12:28 am

    Those are so cute! I am in need of a new key fob too!

    Reply
  3. BluBabesCreate says

    July 16, 2011 at 12:35 am

    This is great! I’ll never lose my keys again! LOL!

    Reply
  4. Lina - Fancy Frugal Life says

    July 23, 2011 at 5:08 am

    I love these! thanks for the tutorial. my sis is lucky enough to have an embroidery machine so she makes them with names…fun.

    Reply

Leave a Reply Cancel reply

Your email address will not be published. Required fields are marked *

CommentLuv badgeShow more posts

Welcome! {I’m Stacy.}


Good time, great laughs, and lots of crafts!
I am a full-time working momma of 2 adorable and funny and fully southern little ladies. I like to think that everyone has a crafty side, even if it's only kinda crafty.

{find it}

{follow via Email}

Enter your email address to subscribe to this blog and receive notifications of new posts by email.

Google+ Badge

{previous posts}

Rivit Media Publisher

{Popular Posts}

  • Time for a Quiz | Father's Day Free Printables
  • Custom Ribbon | How to Print on Ribbon
  • Camping Pillow Tutorial | Ann Kelle Fabrics
  • Can We Play? | Last Day of School Cards
  • DIY Stripes and Glitter Mason Jar

{Facebook}

Unable to display Facebook posts.
Show error

Error: (#200) Provide valid app ID
Type: OAuthException
Code: 200
Please refer to our Error Message Reference.

{Instagram}

{Pinterest}

Follow Me on Pinterest

Copyright © 2025 · Daily Dish Pro Theme on Genesis Framework · WordPress · Log in