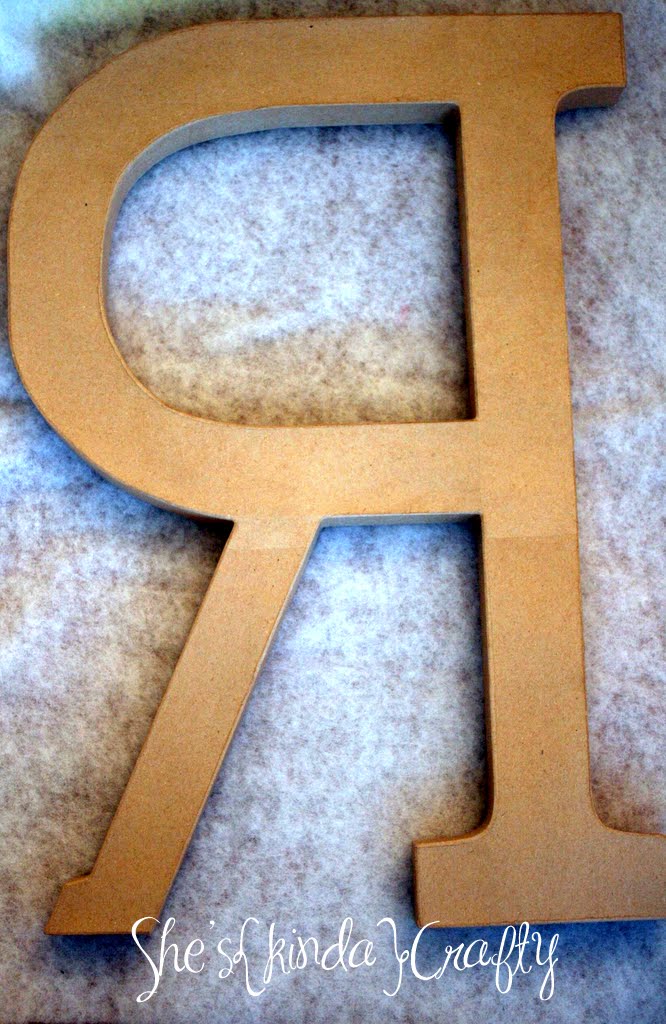
One of the first projects that I did to prepare for Regan’s Bake Shop was this huge 23″ fabric covered R.

I actually bought the R when I was down in Florida for Thanksgiving last year since my JoAnn Crafts doesn’t carry them in our local store (but I knew my sister’s store carried them). They are also available online and only cost $9.99 – or use your coupon and get them for even less! I really love paper mache letters, there are endless ways you can decorate them – paint, fabric, paper, ribbon, cupcake wrappers, felt…endless possibilities. I decided a padded fabric with ribbon edging would be cute for this party (although cupcake wrappers would have been SUPER cute for a bakery theme). This project is pretty easy, so here is a quick tutorial for you!
Supplies:
batting
fabric
paper mache letter
stapler or staple gun
ribbon that is the same width as the depth of your letter
hot glue
scissors
disappearing ink pen or like colored marker
spray adhesive (optional)
Flip your letter upside down and trace it onto your batting. Cut out leaving a 1/2″-1″ border.
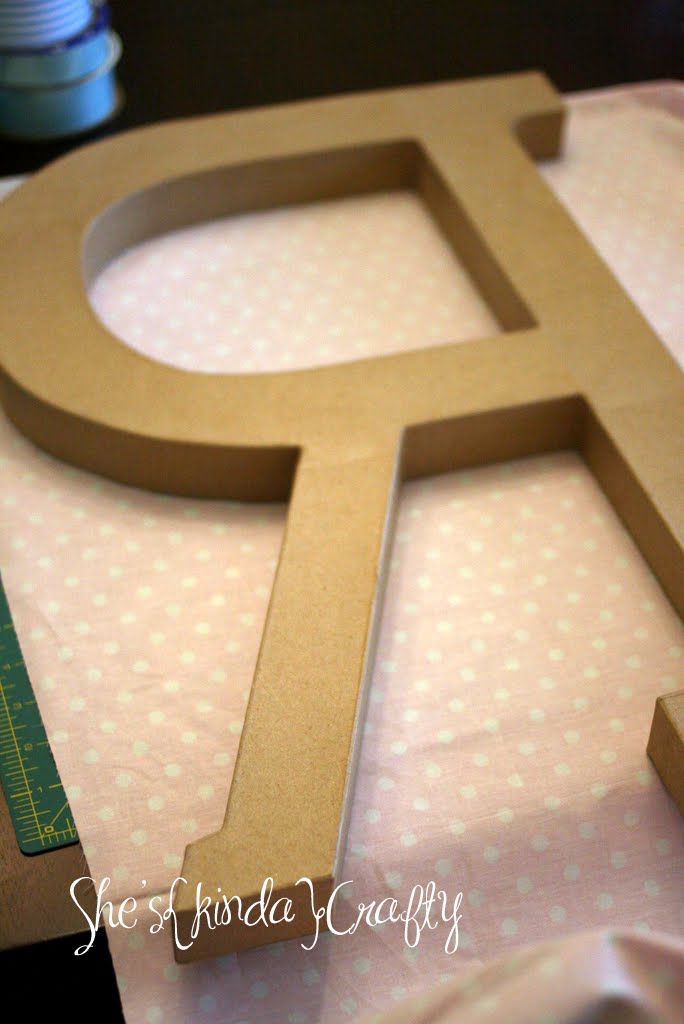
Do the exact same thing with the fabric, making sure you leave a border that’s a little larger than your batting.

Use a little spray adhesive on the right side of the letter and then lay the batting down on top. You can also just use a little hot glue here and there to adhere the batting.

Then lay your fabric, right side up, on top of the batting. As you can see, you don’t need to be too careful when you cut out your fabric.

You want to notch and clip any rounded parts if your letter has them.

Pulling the fabric lightly, add staples every so often to secure the fabric.

Continue all the way around your letter until you are happy with the letter’s look from the front. Then, using a little hot glue as you go, wrap the “sides” of your letter in matching or contrasting ribbon. I used a solid aqua grosgrain 1.5″ wide ribbon to add in the other party color to this project.

After looking at this photo I decided that I needed to glue my ribbon down better so I added some hot glue where I saw the ribbon not totally conforming to the letter.

Then just using a nail I hung the letter in our Kitchen, added some pretty paper pendant bunting from Polka Dot Market and I was done!!


very sweet!! looks great!
Waitaminute… no sewing? I can totally do this! (Sure, I’ll burn myself on the glue gun, but that’s not permanent, right?)
Yours turned out terrific!