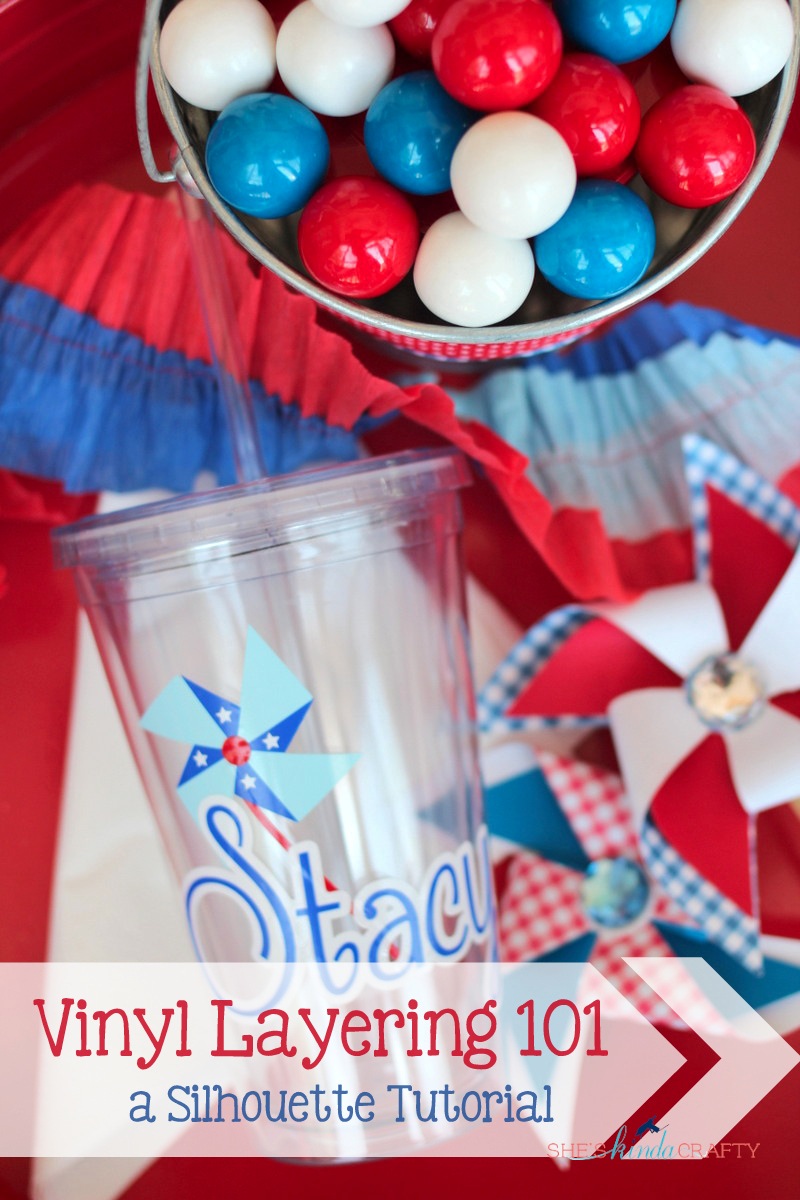
Today I am going to show you how to make the above tumbler using Silhouette Studio and a file I purchased from the online store. Sidenote: I use the Design Edition of Silhouette Studio but it should look very similar to the regular edition, version 2 (I have not updated to V3 and I do NOT recommend the update. There are far too many bugs that people have been reporting).
The first thing I did was purchase this graphic from the online store.

Once it downloaded I double clicked on it and this is how it appeared on my screen (if you need a larger picture, just double click on any of the following photos).

When it comes out of the library all of the shapes will be large and grouped together. IT IS IMPORTANT TO RESIZE ALL THE ITEMS GROUPED TOGETHER. You will never get the design to match if you haven’t resized ALL the pieces together.

This is where having the grid set to 1 inch squares is extremely helpful to me. To size, simply select one of the corners of the grouped design and shrink to a size that will fit your surface.

Then click “Ungroup Selected Shapes” on the bottom left hand corner. After you click the ungroup button you will have to click away from the graphic (anywhere else on the screen) before you can go back and select individual shapes.

Next I go through and color my shapes the approximate same color as the vinyl I am going to cut them out on. This gives me a visual understanding of how the design will look and will help me select all the shapes I need to cut out of any given color.

I have picked 4 different colors for my pinwheel – light blue, royal blue, white, and red. I then like to line them all up so, once again, I can get a good visual representation of the final layered decal.

Now I am ready to cut. I am going to start with red vinyl so I have moved only my red shapes on to the cutting surface. You can see that I have flipped the pinwheel stick to a horizontal orientation, that is just to make better use of my vinyl and have less scraps.

In the Cut Settings screen I have selected Vinyl as my material. Also, I like to cut my vinyl WITH a cutting mat, I have found it to be 10x’s easier to load that without the mat, but it’s up to you. I always cut regular indoor or outdoor vinyl with the blade set to 2.

Load your vinyl or mat.

Just make sure that you have picked the correct loading selection based on your mat choice.

Repeat this process (you won’t need to reset your blade) for every color vinyl from your design.

Now that your layers of vinyl are cut it’s time to gather your supplies.

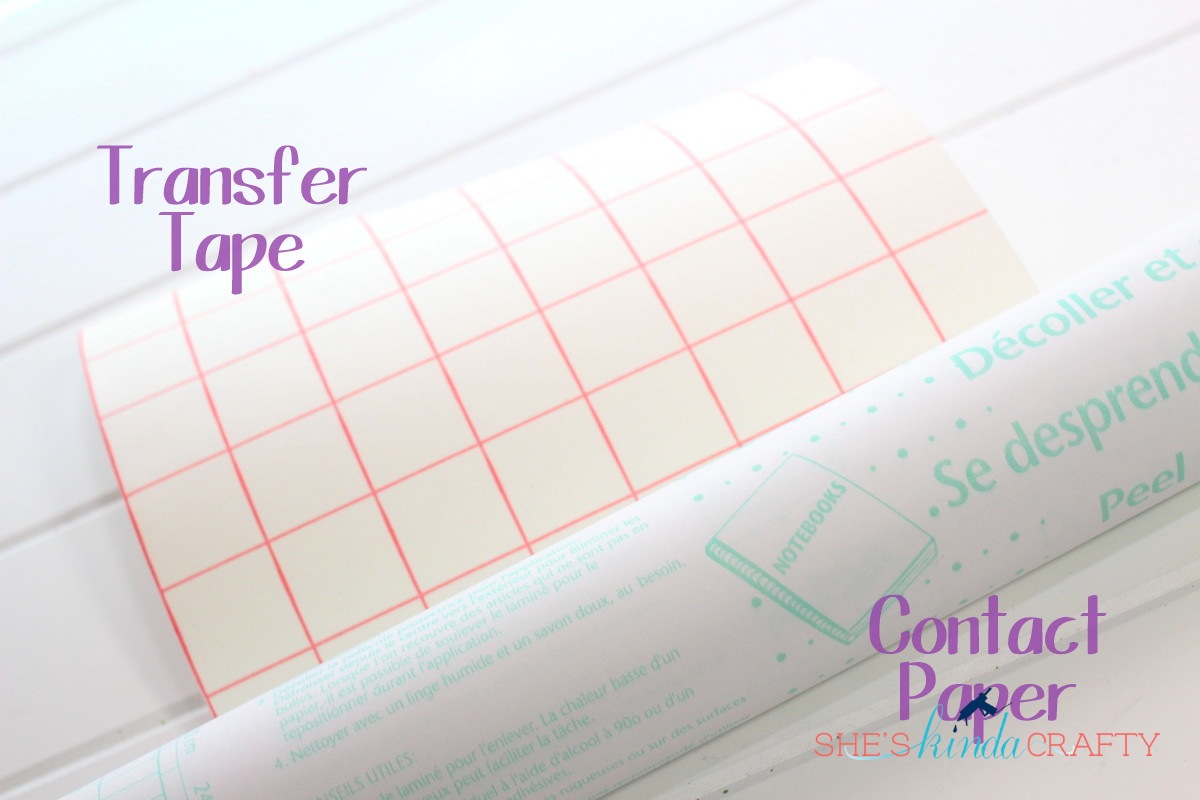
You will need a surface to apply your decal to, a weeding tool if your design is complex and includes inner cuts to a shape (like below where I apply my name), scissors, a ruler to measure your surface, and transfer tape. Transfer tape helps you pick up your design and lay it on top of another piece of vinyl or your final surface. My personal preference for transferring vinyl when I am doing a layering project is to use clear (cheap) contact paper. I don’t feel bad using a lot of it and because it is perfectly clear it helps me align my pieces more accurately.
Peel back your contact paper and put the sticky side down on to your first piece of vinyl – the piece that will be at the very bottom of your design. Rub your finger over where the contact paper meets the vinyl and then lift the vinyl off it’s backing.

Place your vinyl onto your surface, rub it down well, and then remove the contact paper. Continue the process until you have applied all your shapes. I like to refer back to my screen to make sure I am applying all the layers correctly.

Now we are ready to add our name/monogram/initial.
The toughest part of adding your name is picking the font! Click on the Text button on the left hand bar of SS and type in the name you want, then use the text style window to the right to select your text. You don’t want to cut out anything too thin, dainty, or complex unless you have patience and Advil close at hand. This is about the thinnest type of font I like to cut out.

Another tip I have is to (almost) always place your name on an offset, or background, so that it really stands out on your design. Silhouette Studio has made this extremely simple to accomplish.
First, select your name by clicking somewhere on the design, then click the OFFSET button on the top right bar of option. Click Offset and then use the arrows to increase or decrease the area to be offset. This basically outlines your name and creates a personalized background to place your letters on. Once you’ve decided on how large or small you want it, click Apply.


And here is the finished cup! Ready for a whole lot of summer sippin’!

The before, middle, and final phases of my tumbler.

Layering final is a fun way to put almost any design onto any surface. I love giving these tumblers as gift and the options are endless!


Great tutorial, Stacy! Will this work with a Silhouette SD machine? I have that one and never upgraded. 😉
Hi Amanda,
Yes!! It should all work the same, your machine will just look at little different!
Thanks for sharing, Stacy! I have had all the supplies to try this but have not been bold enough 🙂 Do you have a tutorial that shares when you should and shouldn’t “mirror” your image? I was wanting to do a monogram and it’s confusing me. LOL Thank you!!!
Hi Vibeka,
Only mirror your image if you are using HEAT TRANSFER VINYL (also known as T-Shirt Vinyl) to iron an image onto fabric! Hope that helps!
Awesome! Yes, it does! Thanks, Stacy!!!!
Awesome tutorial – thank you so much!
Can’t wait to make these! I saw somewhere tgst when putting on tumbler with a curve you have to do some other step?!? Doesn’t seem like you needed it but maybe you do for bigger designs?
You are correct, you only need to worry about curving your design for large, solid decals. I find if you just start in the middle and go slowly outwards you can apply almost anything on the tumblers w/o accounting for the curve. Vinyl is pliable with a little heat from your hands.
Thanks Stacy! Do you have a preferred store where you buy your vinyl??
Hi Michelle,
I pretty much buy vinyl exclusively from http://www.craftvinyl.com these days. I like their selection and price!
Do you use clear contact paper for all your transfers and not the expensive transfer tape they recommend? I find myself saving every scrap because it is so expensive. Contact paper would be fantastic!
Amy
amyjperry@gmail.com
Where do you get your tumblers?
Colleen
Marshsong48@gmail.com
I found some clear ones at Dollar Tree! That’s what I’m using to make my Christmas gifts!
What exact vinyl did you use on this project? Matte, gloss, indoor, outdoor? The site you gave is wonderful, but there is no search functionality. I went to purchase the correct thing. This is a great project that I do plan to use very soon!
I use gloss outdoor vinyl (651) for almost everything. You will need it for this because it will get wet. – Stacy
Thanks for sharing your tips on layering! As a Silhouette newbie I need all the help I can get! I am curious what font that is on your name. Its cute! Thanks!
Brilliant post. Ordered my machine today. CANNOT wait to get started. Thank you for the inspiration!
Fabulous tutorial on layering. I have some tumblers on hand and can’t wait to get started on some for gifts. I’d love to know the name of the font you used for your name.
Hi Michelle, it’s called Frosting for Breakfast.
im REALLY new at this so I missed how you went from loading the red vinyl to having all the small pieces of paper with your designs on them. Cut w scissors? Peel the vinyl and the design just stays on the backing? I tried a test word and nothing peeled nicely. Where do I look for more details on how to do this step?
When you cut the vinyl with the machine you have to “weed” the background (that’s where I show using my little hook) off the vinyl backing leaving only your desired design. If you go to YouTube Silhouette America has a channel where you can watch videos.
thank for the tip of the cheap contact paper.
Could I do this with a sir cuts a lot software?
I have never used that software so I do not know. sorry.
Thanks for the tutorial, it was great. I have just got my Silhouette Cameo and I am anxious to get started but don’t want to waste a lot of expensive product. I love the way you showed each step. I will definitely try this project.
What was the name of the font you used? It’s hard to find one with a good S.
Is this vinyl spied to the ouside of the cup? How does it hold up when washed?
Yes, I apply “outdoor” gloss vinyl to the outside. The cups themselves need to be handwashed which is perfect for the vinyl. I’ve never had a problem.
hi, do you put anything over the vinyl after you put it in your cup or what ever time you are decorating so that the vinyl does not fall off when you wash it?
I use “outdoor” vinyl and have yet had any issues with hand washing. In fact, I have had no issues with the vinyl when it came to the dishwasher although I have had a plastic bottle melt in the dishwasher…but the vinyl stayed attached.
This is a fabulous tutorial! I have been wanting to learn how to layer vinyl & now I know. Off to the Dollar Tree!
Hi I have the free silhouette software on my computer. Do I need to buy the designer edition in order to make this?
You only need the design edition if you are wanting to cut svg files (which I love) or need more advanced design options.
You’re very brave & confident using this method. I learned to layer multiple colors of vinyl using registration marks & starting with the top color first. When making several copies of the same design they’re more likely to come out the same rather than eyeballing each one. There’s a great tutorial for this technique on Terri Johnson Creates website. Check it out.
FINALLY a simple and easy to understand tutorial for newbies like me. A million thanks!
Have been trying to decide if buying one of those handy dandy machines was worth it for my budget. Have been concerned would have to keep buying things, images, etc. to use it to make it worth the money. Few weeks ago Michaels had a Cricut Air (Lia Griffith special edition) for $229.99. Boy am I sorry didn’t buy then. Who knows if that machine will come back for that price anytime soon again. I am pretty digitally challenged but was determined to learn how to use that machine. Will it be worth if I can afford to buy it? Am on SS, only income.
Have any of you ever been on Lia Griffith’s blog? Oh my heavens the projects she offers (on membership of $5 monthly for some projects) are incredible. Will keep you crafting, etc. from now on. If you choose to contact me please do so at email address, thanks
Do you print the offset on white vinyls?
I don’t print anything when it comes to vinyls I do however cut the offsets in white vinyl and then layer the letters on top.
what is the font called you used?