You read that title right! I have a Christmas stocking that you can make in about 15 minutes (give or take depending on how fast you like to sew).
*please note that I am not a great seamstress, so if you are really into sewing you might get a chuckle out of my way of doing things!
The quickness in this stocking has more to do with the fact that you don’t have to pre-cut much, saving you a lot of boring tedious work especially if you are going to make multiple stockings. Also there is a lot of time saving in the fact that you don’t have to use any pins to hold together cut out pattern pieces, just hold your fabric sandwich tightly as you sew! Last year when I bought all this material to make my stockings I must have read easily 25 tutorials on making stockings. Just go ahead and google it, there are TONS out there. However, they all had patterns and pieces associated with them, and I am just really bad at cutting out pattern pieces. So I came up with this cheater method (at least I think I came up with it, I might have seen it in one of the 25 tutorials I read last November, so if you invented this method, I mean no hard feeling). I didn’t really care about maximizing my fabric usage for this project but you could probably get 2 more stockings out of your 4 yards of fabric if you lay it out a little differently…you’ll see.
Supplies (for 4, possibly 6 stockings)
~ 2 – 1 yard pieces of outer fabric (if you are making just 1 you’ll need 1/2 yard cut in half to make 2 fat quarters)
~ 2 – 1 yard pieces of fleece for the lining (again 1/2 yard to make just 1)
~ 12″x40″ piece of fabric for the cuff (each cuff is 12″x10″ so add more if you are making more stockings) – might also need more than 12″ wide if your pattern stocking is really wide
~ A 12″ length of ribbon for each stocking
~ thread, scissors, sewing machine
Step 1 – Make a fabric sandwich by layering your fabric in this order: Fleece face up, Outer fabric face up, Outer fabric face down, Fleece face down

Step 2 – using a stocking you already have as a pattern (I used one from Pottery Barn, thus the really strange shape of my stocking, so says my husband) and with a fabric marker or sharpie, as I did, loosely trace around the body of the stock giving yourself a 1/4-1/2 inch margin. It doesn’t have to be exact, that is the beauty and quickness of it all! Repeat around your large 1 yard fabric sandwich as many times as you want or can.

Step 3 – Cut each stocking you’ve traced out of the larger 1 yard fabric sandwich and take to your sewing machine. Simply sew right on the line you’ve drawn, holding all your fabric tightly so it stays smooth, remembering to back sew at the start and end. Using scissors (I used pinking shears) trim off the excess fabric leaving a 1/4″ seam or so and then turn your stocking right side out. Repeat this process for each stocking.

Step 4 – Take your 12″x10″ piece of cuff fabric and fold it in half, right sides facing, so you have a 6″x10″ rectangle. Sew the 10″ open end together using whatever seam allowance you need so that the cuff is just slightly larger than your finished stocking body from the step above.

Step 5 – turn your long cuff right side out

Step 6 – Fold your long cuff into itself to that the wrong sides are facing each other and you now have 1 open end and 1 folded end – should be 5″ tall if you used a 10″ tall piece of fabric

Step 7 – Open up your stocking and insert your folded cuff into the stocking so that the open edges and in line with the open edges of the stocking (you should now have 4 layers of open edges going around the entire stocking – outer fabric, fleece, cuff, cuff)

Step 8 – fold your 12″ piece of ribbon in half

Step 9 – insert the folded end of your ribbon in between the fleece layer and the first cuff layer of fabric, this will be your hanger so make it as long or short as you want remember that the actually hanger part is INSIDE the stocking at this point.

Step 10 – Sew all the way around the top opening your stocking using about a 1/2″ seam, make sure you catch all layers so you don’t have to take your seam ripper out and start again, not that I had to do that with stocking #3 or anything! Remember to back sew at the end of your circle. Then just flip the cuff up and over the body of the stocking and you’re done!

Of course you could iron the seams down and junk like that, but I hate ironing!

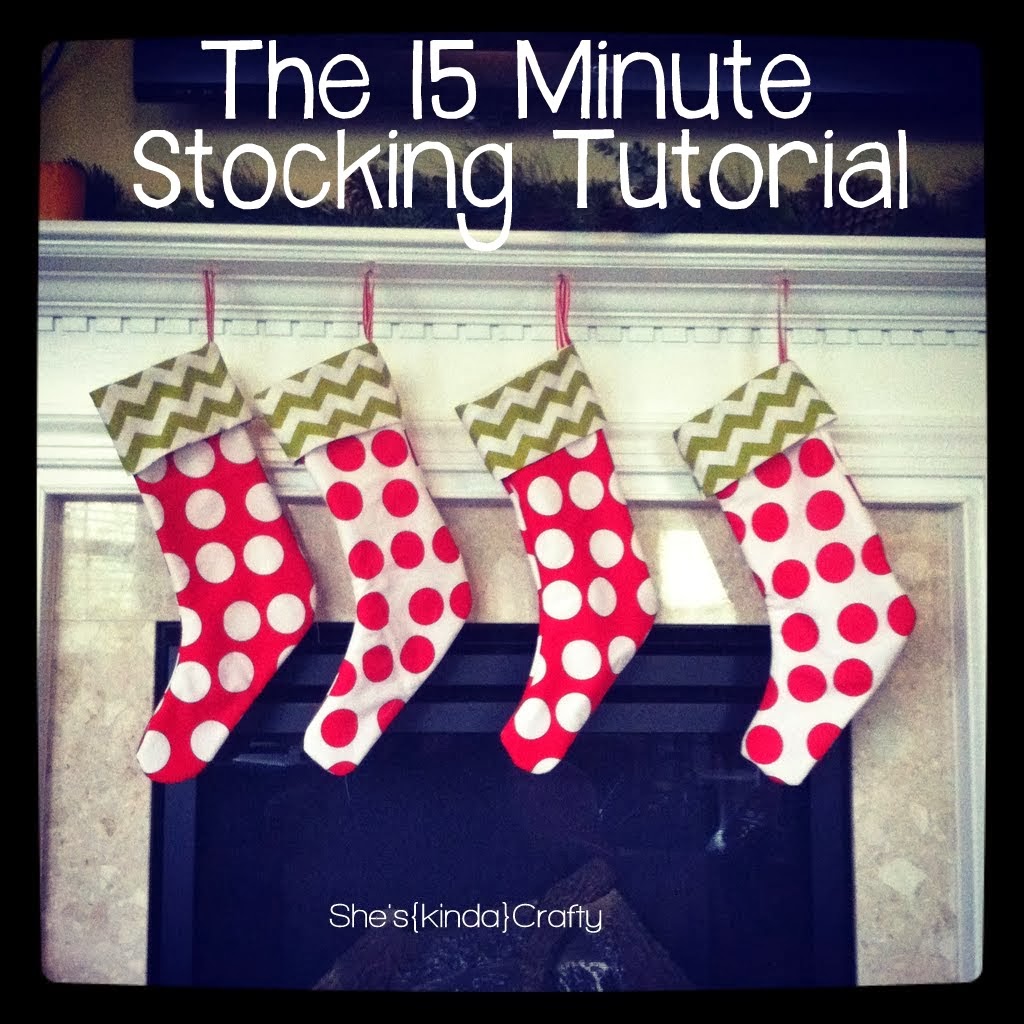
My husband says they are a strange shape so I blame Pottery Barn since theirs is the stocking I used to trace around 

I hope you enjoyed my tutorial, I took all the pictures with my iPhone using Instragram! If you have an iPhone I HIGHLY suggest you download and use Instagram when taking photos, it’s fun and it’s FREE!!


Really cute! Love the fabric choice!
Super cute- adore chevron!
Super fun. Great job mama.
I think they’re adorable.
These are great and love the fabric combos!
Super cute! I never thought about making my own stockings but I might have to try this out! Thanks for the tip! Stopping by from SITS!
They are so cute!!! I just featured them on my TT&J Facebook page
xoxox
Jen
Awesome! I just got a sewing machine for my Anniversary this month…and needed something fairly easy to start with! I think I am going to have to try this project. I love the idea! I’m a new follower of your blog too!
~Lisa @
http://www.organizedchaos-lisa.blogspot.com
I really like the fabrics you chose.
Where did you get that cute fabric?!!
Cute! I love your fabric choices. I have been wanting to make some stockings for a friend of mine, but I didn’t think I had the time. Now I’m inspired!
Thanks for the easy and cute stocking tutorial! I’m so using this!
Thanks for this! I just finished making 10 stockings! I sent you an email with a picture of 7 of them!