Shes {kinda} Crafty

Dedicated to All Things {kinda} Crafty

  • Home
  • Blog
  • About Me
  • Shop
  • Wreaths
  • As Seen On
  • Privacy Policy

Silhouette {Tutorial} – Print & Cut

March 15, 2011 By Stacy 26 Comments

The Silhouette can do many amazingly awesome things, the problem is you have to know how to use the software to get it to do all those amazingly awesome things. I will try to bring you some Silhouette Tutorials as questions come my way.

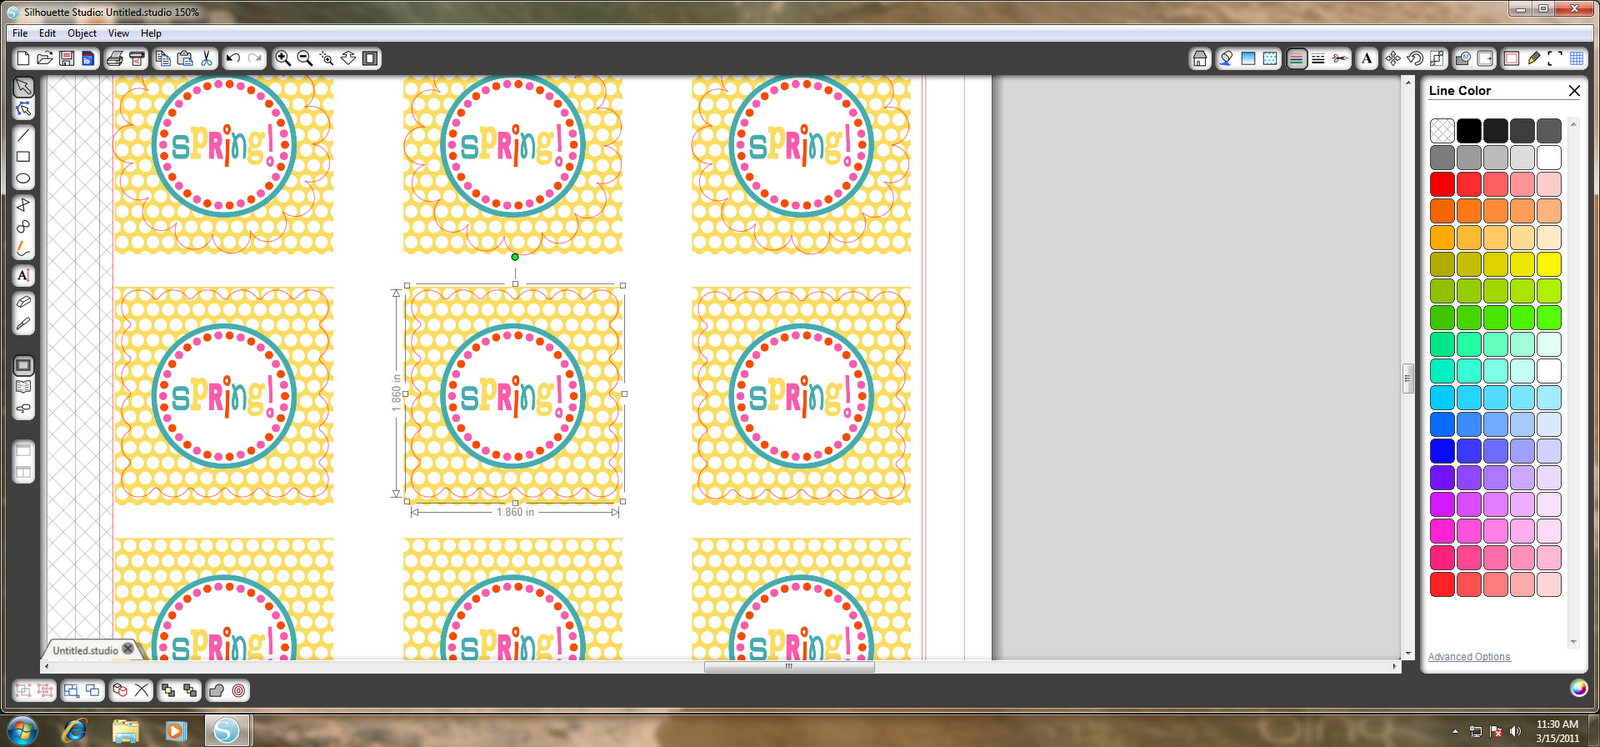
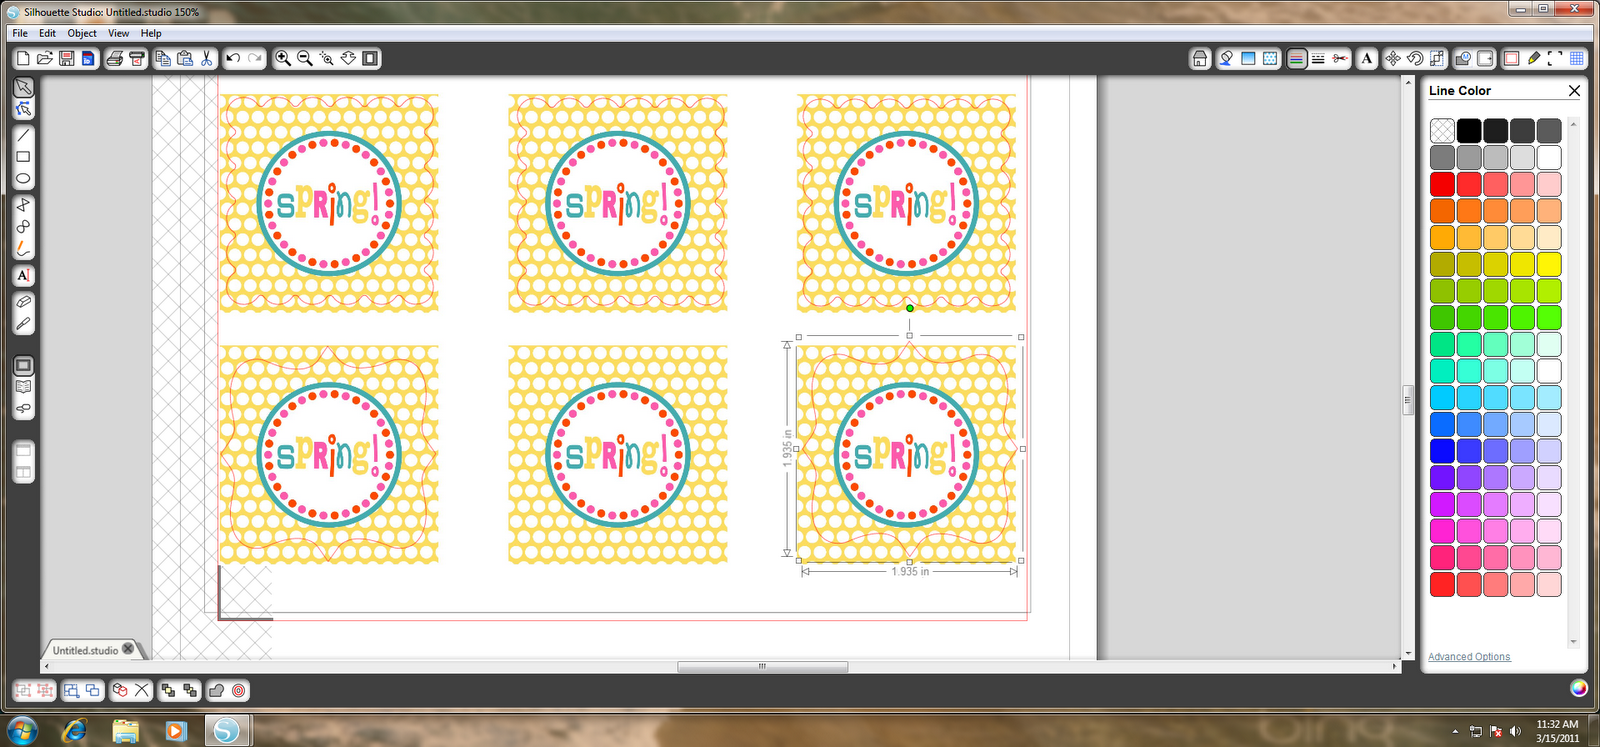
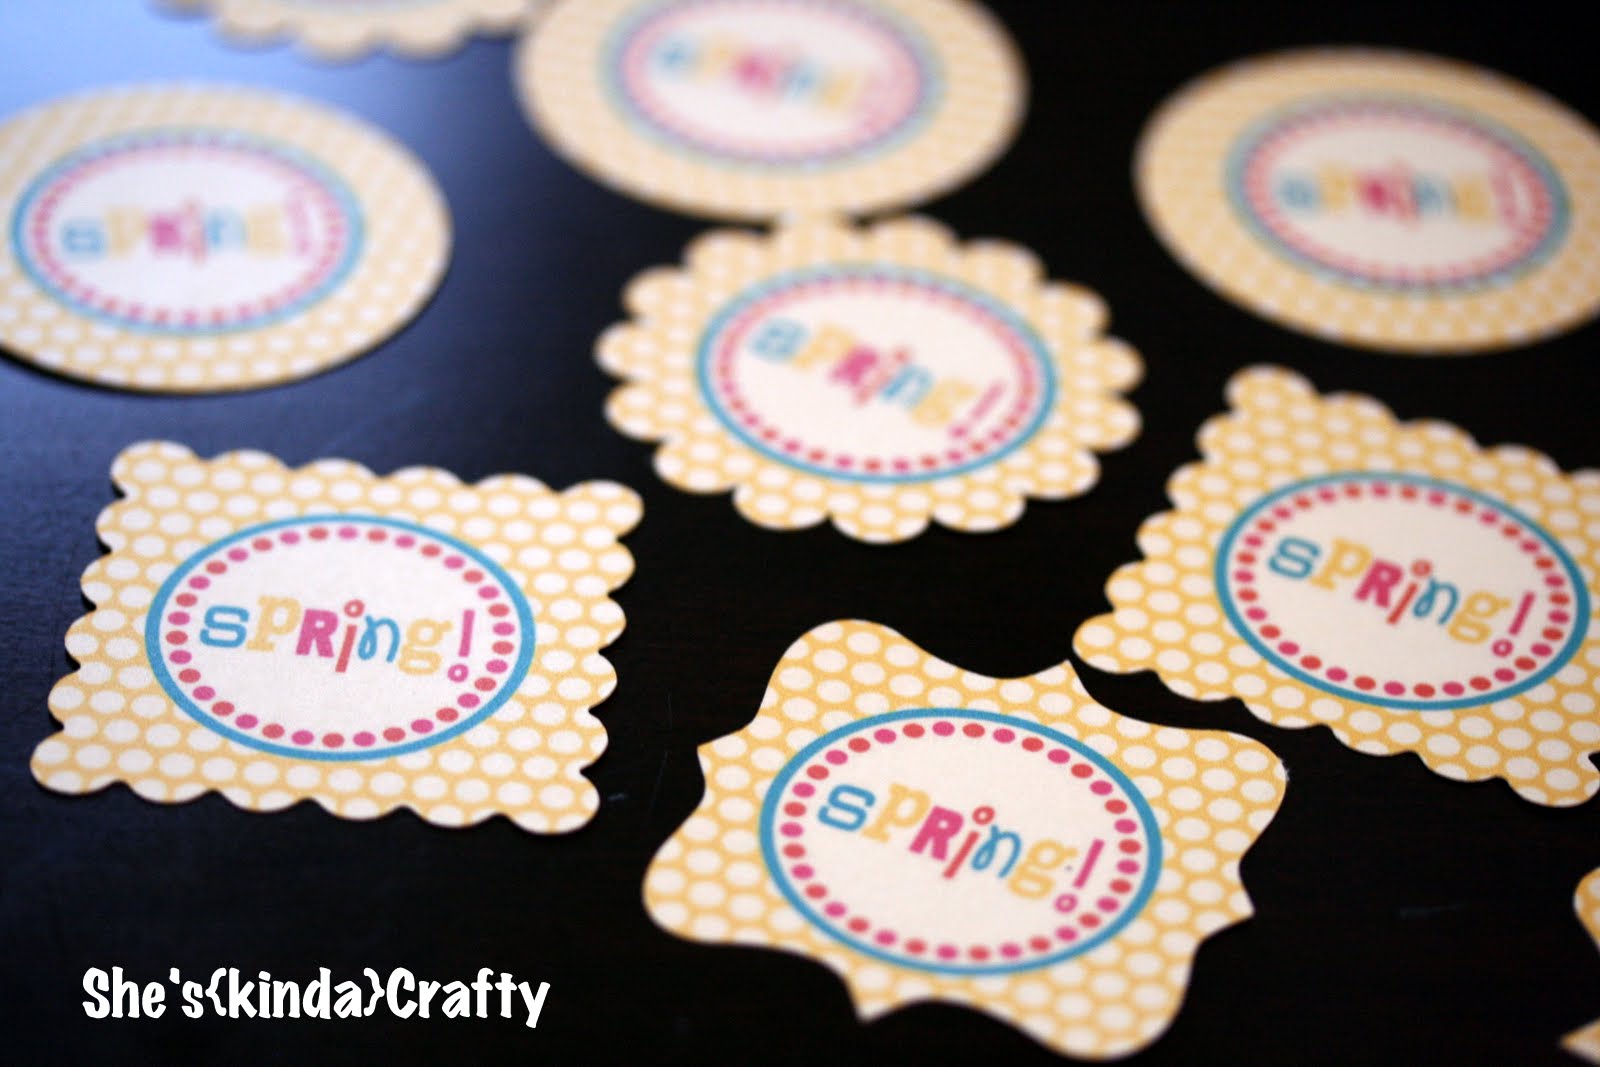
Today’s tutorial is how to effectively use the Print and Cut feature on your machine to “punch” out party circles/logos/tags in many different shapes without needing any physical punches! I am going to use my Spring party tags from my latest Crafty Ladies Night Out post. However after going through the steps to make the tutorial I realized it would be easier if I resized my dimensions to make it easier for you. So you can now download those newly resized pages here and here. However my screen shots will have the original files.

***warning – the following tutorial is rather wordy – my apologizes in advanced***
{if you want to see more details in the photos just click on them to get a full screen view}
Open a new Silhouette Studio page and turn on your registration marks
  Import the downloaded file into your Library
Go to your image library and double click on the file you just imported. If you can not find it make sure you are looking in the folder that is called “Show All Designs” it should be in there. When you open the image it will be much larger than your page, just resize it until the graphics fit in the red box (which is the constraints on the cutting area).
It should look like this
 Using the circle drawing button on the left hand side of the screen, make a circle that is the size you wan your “punch” to be and center it around the tag (Silhouette studios gives you great guides that show you the height and width of your drawing so you know it’s an exact circle). 
a closer look – then copy and paste that circle as many times as punches you need. You will have to manually center the circles on top of each graphic.
But you don’t just have to use circles. Here I took a scalloped circle shape I had and resized it to fit my graphic and then copied and pasted it 2 more times.
And then I did the same with a scalloped square
And a fun bracket shape, too!
(this completes our screen shot portion of the tutorial)
Now you are ready to print and cut the page. Here is where the tricky wordy part starts. First you want to go to Object Cut Line Settings and make sure that the large imported file is not set to cut because it will try to cut all the way around the border of that file you imported (just select that line/large box that is going all the way around the page and then click “no cut”). Then, for some reason Silhouette will not print the registration marks correctly if you have an image on top of them (even though you can clearly see those registration marks in full in the photo above, the white portion of my image is sitting on top of them and they wouldn’t print out for me). So if at all possible make your image smaller than those marks.
Now we are ready to cut. Select your paper type and make sure you have the right blade setting for your paper type and press “send to Silhouette”. It will ask you if you want to print or skip printing, go ahead and print your paper with the registration marks. Then it will ask you if you want to detect registration marks, and the answer is Yes! This is how the machine knows exactly where to cut your shapes in relationship to your printed page. Once the marks have been detected you just tell it to go ahead and cut and that’s it!! Now it may take a couple of times of trial and error to get it all down but of course practice makes perfect! Here is what mine looked like
I hope that this make some sense. It is way easier to do than to explain, so if there are any parts that don’t make sense please leave a comment and I will email you back! Or leave me a posting on my Facebook page and I will get back to you there! Happy Crafting!
this blessed nest


Fantabulous Friday!

giveaways
The Girl CreativePhotobucket

Serenity Now Crafty Cutter PartyPhotobucket

Related posts:

Default Thumbnail#TBT (Throwback Thursday) Print and Cut Tutorial Default ThumbnailPrint and Cut 101: Back to School Labels Default ThumbnailVinyl Layering 101 | A Silhouette Tutorial Default ThumbnailCustom Ribbon | How to Print on Ribbon

Filed Under: Silhouette, tutorial

← Hooray for {500} Giveaway!!! Ribbon {Maniac}!!! →

Comments

  1. melanie says

    March 15, 2011 at 5:39 pm

    Thank you Stacy!! This will help me so much, I am new to the Silhouette and feel overwhelmed with all it can do!!

    Melanie

    Reply
  2. Holly says

    March 16, 2011 at 12:57 am

    Me too! Thank you so much! This was awesome! What kind of paper do you like to the best?

    Reply
  3. reasonstoskipthehousework says

    March 16, 2011 at 2:41 am

    I’m going to follow this to make some cutouts for my daughter’s first bday this Saturday! So cute! I just got my Silhouette and haven’t used it for much yet! I’d love for you to link up on my new Link Party – Tuesday Time Out!

    http://reasonstoskipthehousework.blogspot.com/2011/03/tuesday-time-out-link-up-party.html

    Smiles,
    Melanie
    http://reasonstoskipthehousework.blogspot.com

    Reply
  4. Alisa says

    March 16, 2011 at 2:43 am

    Very Cute! Wishing I had a silhouette 🙂

    Reply
  5. Amanda says

    March 16, 2011 at 1:09 pm

    Thanks for this, I’m almost positive I will be buying a Silhouette next payday, will be book marking this to help me with it!

    Reply
  6. this blessed nest says

    March 18, 2011 at 4:02 am

    do you know how many times i’ve come back to this post to leave you a comment???

    this is so written for me but waaaay over my head. you KNOW i need to learn this, i just got a silhouette & am struggling to learn all this stuff.

    thanks for this – seriously! bookmarking for sure.

    thanks for linking this up for the SPRING FLING. you’re the best!

    xo
    kellie

    Reply
  7. tracylaf says

    March 18, 2011 at 10:19 am

    THANK YOU!!!!! I’ve had my Silouhette for a while now and have not mastered the print and cut feature!!!!! This has been really helpful!!!

    Reply
  8. PartyMom says

    March 18, 2011 at 11:35 am

    Fabulous tutorial! I haven’t yet used the print & cut feature because I’ve had so many alignment issues. I had no idea how to use registration marks, and this has helped so much…I can’t wait to try it out this weekend!

    Reply
  9. mel says

    March 19, 2011 at 2:20 am

    thank you for this! i have yet to use the print & cut feature as well. i’m giving it a try this weekend. 🙂

    melanie
    layercakedesigns.blogspot.com

    Reply
  10. j.g.photography says

    March 19, 2011 at 5:57 am

    Thanks for the tute! Too bad I didn’t have this 3 months ago when I wasted my pretty paper! In all my trial and error, I found a way similar to yours, but might a bit faster. Instead of importing to my library, I just saved my image as png, and opened it through the silhouette software, then did trace, or used the shape I wanted. I hit CTRL+A copy and pasted as many times as I could to fill the page. That way each image, and cut would be EXACTLY the same. Make sense? So instead of creating a bunch of cupcake toppers in PS, I just created one, then copied them in silhouette. I hope I made sense here, If not, then I’m just a crazy lady, and you may ignore me! Ha!

    Reply
  11. Green Gracie Home says

    March 21, 2011 at 12:30 am

    THANKS! My glitter pens came yesterday and I love having a visual to guide me through.

    Reply
  12. I♥naptime w/ Chocolate Sundaes says

    March 21, 2011 at 3:07 am

    LOVE this! SO SO cute! Did you create those tags yourself? Any tips.. I’d love to make something similar for a baby shower I’m in charge of.

    Reply
  13. Amanda @ Serenity Now says

    March 23, 2011 at 1:49 am

    This was a great tutorial, Stacy! 🙂 Thank you for taking the time to type everything up…and for sharing your files. 🙂

    Thanks for joining my Crafty Cutter party. 🙂 Hope you find some great crafty inspiration! 🙂

    Reply
  14. MrsMarch says

    March 23, 2011 at 2:38 am

    Thank you for the post, trying it as we speak. It was kind of confusing but you basically print the two times you mention (on/off reg marks) on the same piece of paper right?

    hopefully I’ll get it!

    thanks again.

    Reply
  15. Kelly says

    March 23, 2011 at 2:42 am

    Thank you! I love my silhouette! I love this! I’d love if you linked this up to my very fist link party! http://runwithglitter.blogspot.com/2011/03/glitters-first-linky-party_22.html

    Reply
  16. Holly says

    April 9, 2011 at 12:05 am

    Thank you! Especially for the tip about moving the image, printing the registration marks, and then moving it back. I was so frustrated trying to figure that out. Once I finally figured out that the “white” part of my image was “covering” the marks, even though I could see them, I ended up using the eraser on the corners, but it was still trial and error. Your way seems much better!

    Reply
  17. Lolly Jane says

    April 18, 2011 at 2:34 am

    Super cute! Would love for you to link this up 🙂

    Lolly Jane
    lollyjaneboutique.blogspot.com

    Reply
  18. Jeanine says

    April 19, 2011 at 2:39 am

    Hi, great tutorial!!! I do have a question, can you do a tutorial on how you made the artwork? I am having a most difficult time trying to figure it out, your is so pretty! Than you for all you do!

    Reply
  19. g8rmaria says

    October 25, 2011 at 2:43 am

    do you print on your printer first? confused still , trying to learn this silhouette!!!

    Reply
  20. Jess says

    November 22, 2011 at 3:47 am

    This comment has been removed by the author.

    Reply
  21. Jess says

    November 22, 2011 at 3:50 am

    LOVE these!!! I have a silhouette and I made “printables” in the silhouette program…I had less options than using a different design program and then when I went to cut them, the circles were all off so they were all uneven. This tutorial is soooo helpful!! Thanks for the tips! Also, I second Jeanine, tutorial on how you made the artwork would be awesome because yours look amazing!!

    Reply
  22. Em says

    October 24, 2012 at 6:04 pm

    Thank you so much:)! I am making sugar scrubs that need labels made. I have been so scared to use my silhouette but now I know I can do it:)! Your explination was great. Thank you for your time and tut:)!!

    Reply
  23. Claudia says

    July 4, 2013 at 5:11 pm

    Dear, you saved me! I was looking for this tut, & now i´ve found. Ty & xoxo from Brazil.

    Reply
  24. warrenalbert201 says

    November 23, 2013 at 10:51 am

    Oh my goodness….this is incredible!! I have just discovered your phantastic blog, thank you for sharing your printing ideas!

    flexographic label printing

    Reply
  25. Sue says

    January 10, 2015 at 10:01 pm

    Does it matter what kind of file you download for the silhouette? I have downloaded a few things but it won’t let me use them?

    Reply
    • Stacy says

      January 12, 2015 at 1:32 am

      Hi Sue, downloading a print and cut file is the easiest way to go about it. You can search the store for only P&C files. They are noted by a small P in the lower right had corner. You can import any jpg into silhouette though to be able to do print & cut.

      Reply

Leave a Reply Cancel reply

Your email address will not be published. Required fields are marked *

CommentLuv badgeShow more posts

Welcome! {I’m Stacy.}


Good time, great laughs, and lots of crafts!
I am a full-time working momma of 2 adorable and funny and fully southern little ladies. I like to think that everyone has a crafty side, even if it's only kinda crafty.

{find it}

{follow via Email}

Enter your email address to subscribe to this blog and receive notifications of new posts by email.

Google+ Badge

{previous posts}

Rivit Media Publisher

{Popular Posts}

  • Time for a Quiz | Father's Day Free Printables
  • Custom Ribbon | How to Print on Ribbon
  • Camping Pillow Tutorial | Ann Kelle Fabrics
  • Can We Play? | Last Day of School Cards
  • DIY Stripes and Glitter Mason Jar

{Facebook}

Unable to display Facebook posts.
Show error

Error: (#200) Provide valid app ID
Type: OAuthException
Code: 200
Please refer to our Error Message Reference.

{Instagram}

{Pinterest}

Follow Me on Pinterest

Copyright © 2025 · Daily Dish Pro Theme on Genesis Framework · WordPress · Log in